What to Know If You’re Planning on Growing Strawberries

153166621
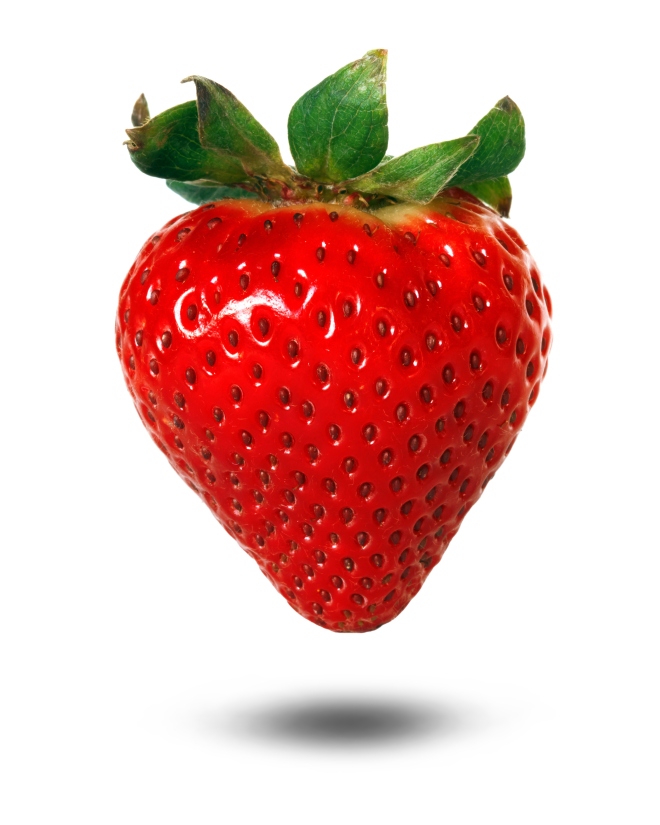
Strawberries are a favorite fruit for many. They are relatively easy to grow, and most strawberry plants produce an abundance of fruit each year.

The Life Cycle of a Strawberry Plant

Strawberries start growing between February and June, depending on the region. A lot of strawberries produce runners that have baby plants at the tips. The runners root themselves nearby and stay attached to the central plant. Strawberries then usually take a break from producing during the second half of the summer. Keep your parent plant weeded and lightly watered, and it will grow again in the fall. In September, the plants develop latent buds that grow into flowers the next spring.

How to Care for Your Strawberry Plant

Your strawberry plant should have at least eight hours of direct sun every day. If your area has naturally alkaline soil, grow your strawberries in half-barrels or in another type of large container filled with potting soil. You can also sulk your strawberries in heavy clay.

Space your strawberries 18 inches apart, since they eagerly produce offspring. Some strawberries, like Loran, don’t produce many runners, if any at all, and they can be spaced 6 inches apart instead. Make sure the roots are well covered by soil, and that the central growing bud, otherwise called the crown, is exposed to fresh air and light. Water your strawberries well, and use mulch to keep the plants clean and the soil moist. Your plants will most likely start blooming in early spring, and once bees and other pollinating insects visit the flowers, they will start to set fruit. If you live in a warm, sunny climate, your berries will ripen about 30 days after the blossoms are fertilized.

Troubleshooting

Certain pests, diseases and climate conditions can keep your strawberry plant from thriving.

  • Slugs—If you notice slugs as your fruit ripens, use plastic mulch instead of straw mulch.
  • Fungal diseases—In the summer, you may notice dark spots on your leaves, which is an indication of a fungal disease. Clip or mow your strawberry foliage and rake it away in the summer. This disrupts the life cycle of some strawberry diseases, as well as pests.
  • Birds—Keep robins, brown thrashers, and other pests from stealing your berries by covering the plants with a lightweight bird netting as the berries begin to ripen.
  • Heat and drought—If you have a particularly dry year, the fruit should return to normal size once the weather improves. Also make sure to water your plant well.

Harvesting and Storing

Pick your strawberries in the morning, when the fruit is still cool, and put it in the refrigerator right away. Rinse the berries right before you cook or eat them. If you have extra strawberries, you can freeze them, dry them or make them into jam or preserves.

Please LIKE and FOLLOW for future posts and blogs on Gardening.


Indoor Plants that Are Easy to Keep Alive

186753608Just because you don’t have a garden doesn’t mean you can’t enjoy having your own plants. These plants liven up any room and are easy to care for. Some even help clean up your indoor air.

Aloe

This succulent has long, pointed leaves with well known medicinal properties. It can grow up to three feet high and is perfect for a small, sunny space indoors. The aloe plant prefers room temperatures of about 70 degrees and lots of sunlight. It doesn’t like frequent watering, so it’s very easy to care for.

English Ivy

Ivy has timeless elegance, and you can easily start a new plant by cutting some of the stem. English ivy trails nicely down furniture for a beautiful accent. It likes cooler room temperatures, between the mid-50s and 70, and it prefers moist soil.

Jade Plant

Jade plants have thick, lush leaves with interesting branches. These plants grow slowly and can live up to about 20 years. Jade plants prefer normal indoor temperatures and bright light, and they don’t require a lot of water.

Rubber Tree

This tree can grow to an impressive eight feet high indoors. You can also keep it smaller by pruning it to your desired height. The green leaves have a nice shine and can brighten up any room. The rubber tree prefers medium to bright light and temperatures between 60 and 80. Let the surface of the soil dry out in between watering.

Peace Lily

Peace lilies are a popular choice due to their pretty appearance. They have curving white blooms and dark leaves, and they don’t take up much space. This plant likes low light and low humidity and prefers moist soil. It will grow best in a room without windows, and grows best in temperatures up to about 85 degrees.

Snake Plant

Snake plants are great accent pieces that can make any room look more sophisticated. They have a very unique look, with leaves that grow completely upright. They also produce small flowers, though these don’t bloom very regularly. The snake plant can grow in a wide range of lighting options and prefers somewhat dry air and soil.

Shamrock Plant

For an indoor plant with pretty flowers, a shamrock plant is the perfect choice. Its tall stems have white flowers, and the plant has full, bright green leaves. Place it in bright light that isn’t direct. Let the soil get somewhat dry in between watering, and water it about once a week.

With so many options, you’re sure to find the perfect plant for your home.

Please LIKE and FOLLOW for future posts and blogs on Gardening.

How to Plant and Care for Your Roses

491324153You don’t have to be born with a “green thumb” to grow lush, spectacular roses on healthy, thriving rose bushes.

The art and science of rose gardening can be learned. Once you’ve perfected your growing techniques your “green thumb” will blossom right along with your roses.

Planting

Here are the most important planting guidelines:

  • You want your soil to be slightly acidic (approximate pH of 6.5). If it is too alkaline add ground sulfur, and if it is too acidic finely-crushed limestone should do the trick.
  • Plant your roses where they will get at least six hours of direct sunlight each day during the summer.
  • Dig large holes for each plant (15-18 inches wide) and mix significant amounts of compost or aged manure into the soil when you cover the roots.
  • Cut back the plants in the spring and fall to encourage budding, not during the summer when the sun is scorching. Big rose canes can be cut back by two-thirds and smaller canes can be cut down to about 10 inches.
  • To boost calcium and iron put a four-inch square of gypsum board and one 16-penny nail into each planting hole.

Watering

Rose plants need the equivalent of about 90 inches of rain each year. You should soak the plants thoroughly twice weekly during the driest summer months to maintain moisture levels, making adjustments as necessary based on variations in the precipitation cycle.

For effective moisture retention add a three-inch thick layer of mulch around the base of each plant. You can use chopped leaves, grass cuttings or shredded tree bark to create your mulch layer, which should surround the plant without actually touching it.

Feeding

From April through July you should apply non-chemical fertilizer to your rose bushes one time each month.

One cup of a balanced granular fertilizer sprinkled around the near perimeter of each plant would be ideal. In May and June add a tablespoon of crushed Epsom salt to each cup of fertilizer, in order to supply your roses with extra magnesium.

Pruning

Prune your bushes thoroughly each spring and throughout the growing season as needed. Pull out old blossoms to make room for the new and remove all dead flowers until the first frost is imminent, when you no longer want to encourage new budding.

All pruning waste should be cleared out from around the base of your rose bushes. Buy appropriate cutting tools so you’ll be prepared to cut everything cleanly and smoothly.

Preparing for Winter

When the coldest weather comes your rose bushes could be in danger. Here are a few tips that will help keep your plants safe and sound until spring:

  • Don’t prune in the fall but do remove any dead or diseased rose canes.
  • Don’t fertilize beyond mid-autumn but keep watering your bushes when the fall weather turns dry.
  • After the first frost but before the ground freezes surround each plant with a layer of mulch (oak leaves, pine needles or straw) or compost.
  • If you live in a climate where wintertime temperatures plunge, enclose each rose bush in a mesh cylinder and surround it with mulch, dry wood chips or chopped leaves.
  • To prevent spring outbreaks of disease clean your rose beds out completely. Leave no waste behind.
  • Spray for fungus one last time with a dormant fungicide.

One Final Tip

Deer love to nibble on rose bushes. To keep them away plant lavender around your roses, deer can’t stand that odor and will avoid the area while it is in bloom.

Follow our blog for future posts about all-things-gardening.

How to Transplant a Cactus

Saguaro Cactus and MountainsTransplanting a cactus is a bit different from transplanting any other type of plant, due mostly to its awkward shape and prickly surface. The following steps can help make the transition go smoothly.

Step 1: Choose a Healthy Cactus

If you transplant a cactus that isn’t healthy, there is a good chance it won’t survive the move. Choose one without blemishes, bruises or disease. Also check for sunburning and insect and rodent damage.

Step 2: Mark the Cactus

Mark the cactus so you’re sure to plant it in the same direction as it was before. A simple marker can be placed with a piece of string loosely wrapped around the top of the cactus.

Step 3: Dig out the Roots

Cactus roots are very fragile and close to the soil surface, so you want to dig them out very carefully. Start digging about six inches from the plant, slowly working your way around.

Step 4: Lift out the Cactus with a Shovel

Once the cactus has become loose from all sides, gently move a shovel underneath the cactus. Then lift it with gentle prying.

Step 5: Use a Hose if Extra Heavy

If your cactus is large or heavy, you may need something else to help you lift it out. An easy method is to wrap a garden hose around the cactus, slightly below the middle of the plant. Then lift the cactus out of the ground with the hose.

Step 6: Trim Damaged Roots

Trim off damaged roots while the cactus is on its side. If left alone, these roots will decompose and invite pathogens, which can harm the plant. Only trim the damaged parts of the roots, as the cactus won’t grow new roots after it’s been planted.

Step 7: Leave to Air Dry

After you’ve trimmed the damaged roots, let the plant air dry for at least two days. The air will help the roots to scab over, which will prevent pathogens from entering the roots.

Step 8: Use a Hand Truck to Move a Large Cactus

For a large cactus, move it using a hand truck with proper padding. Be sure the spine and ribs are protected during transit.

Step 9: Prepare the New Location

Dig a wide and shallow hole for the cactus. Make sure the soil has enough moisture by adding organic compost, pumice or perlite. Choose soil that drains quickly.

Step 10: Place the Plant

Place the cactus into the hole, making sure it’s oriented correctly. With the back of a shovel or a stick, backfill the soil so there are no air pockets.

Step 11: Water Thoroughly

Water the cactus thoroughly. Irrigate twice a week if needed, unless the nighttime temperature is below 60 degrees.

Step 12: Cover

Cover the cactus with a shade cloth for several weeks, unless the temperature is particularly low. The cover can be taken off when the cactus begins growing again.

Please don’t forget to hit the Like and Follow buttons for future posts!


Pest Control for Your Garden

159291849.jpgMany gardeners turn to pesticides in order to rid their gardens of harmful pests. However, most times such damaging and sometimes toxic measures aren’t necessary. Prevention, traps and barriers, and homemade remedies can often be all the control you need for your garden.

Prevention

One of the most important components to pest control is prevention. Get rid of any weak plants, as they can be a breeding ground for predators. Also clear out any weeds or debris. Use natural composting to strengthen your plants, as well as top-dressing and mulching. Use seaweed mulch or spray, which repels slugs as well as providing important nutrients like iron, zinc, calcium and magnesium. Rotate your crops every year, as many pests are crop-specific. Keep your foliage dry by watering early in the day. Clean your tools if they’ve been used on infected plants, in order to minimize contamination.

Homemade Remedies

These home remedies are specific to the type of pest you encounter in your garden.

  • Soft-bodied insects: Combine one tablespoon canola oil, one quart of water and a few drops of Ivory soap, and fill spray bottle. Shake well, and spray plant from above and below.
  • Mites and other insects: In a quart of water, mix two tablespoons of cayenne pepper or hot pepper sauce, and a few drops of Ivory soap. Let stand overnight and then use a spray bottle to apply to plants.
  • Grubs: Use milky spore—natural granules spread on soil. One application can last 40 years, as it naturally multiplies.
  • Earwigs: Use diatomaceous earth by sprinkling it over plants and around garden bed edges.
  • Fungal diseases: Take two tablespoons of baking soda and one quart of water, pour into spray bottle and spray affected area every few days as needed.
  • Insects and fungal diseases: In a quart of water, mix one tablespoon cooking oil, two tablespoons baking soda, as well as a few drops of Ivory soap. Pour into spray bottle and apply three treatments, one week apart.
  • Powdery mildew: Combine equal parts water and milk and spray three treatments on infected plants, one week apart.
  • Insects on fruit trees: Use lime sulfur and dormant oil, which you can purchase from nurseries and garden centers. Apply with pump sprayer. To make your own dormant oil, combine one cup vegetable oil and two tablespoons of liquid soap into one gallon of water.

Traps and Barriers

Traps and barriers can also be used to keep pests away. These include yellow flypaper, pheromones, apple maggot traps, cloche, floating row covers, and barrier paper.

Please follow our blog for all future posts about gardening.

Info On Growing Raspberries In Containers

468522272

Ever wanted to grow raspberries in containers? Worried that you are not much of a gardener and will be unsuccessful? If you want raspberries that are fresh and home grown throughout the year, you should keep a few simple ideas in mind and you will have healthy delicious raspberries, even during drought. You will want to grow your raspberries in containers at least 24″ in size in beds measuring 2″ at least in height.

You can get regular potting soil and use regular fertilizer and plant food if you wish. Make sure to regularly water your raspberries, and in hotter climates spend extra time watering and pruning your raspberries as well. There are lots of different varieties of raspberries, and they all have varying growth habits and characteristics. One rule of thumb to use is to consider which varieties are available in your area, and therefore you will be able to find those which will grow the best in your climate or zone.

If you are using a large container it will work a lot better overall, smaller containers do not work as well. If you live in an exceptionally cold area with extreme winter conditions, your containers will probably not work very well, so you should really only grow them in warmer climates. Containers will freeze in the ground in very cold conditions, so if you want to grow them still, you could but they will not make it to the next spring season and will need to be replaced.

The availability of different varieties will vary across North America to a great degree. Since there are so many different varieties to choose from, and since all may not be suitable to your area for the conditions, there is a specific variety called Fall Gold that are wonderful. The taste is sweeter than red raspberries, and they are liable to grow well in most climates.

When growing multiple varieties, you should make sure to separate the black and red from the yellow and gold varieties because mixing them is just not advisable.

Follow us for more articles that will give you the best garden on the block…

Growing Your Own Garlic Can Be Easy

177841415

Garlic is a lovely addition to food as it smells and tastes great as a spice. Did you know you could keep a fresh supply of garlic in your kitchen without necessarily refrigerating them? Here are some easy tips on how to grow garlic at home and save on some grocery expenses.

The Planting Phase

110847809Garlic will grow in a small backyard garden or even tiny pots lined on your kitchen window. Garlic cloves are planted into the soil to a depth of 2 inches and 4 inches from each other. The spice clove thrives better in soil temperatures of around 50 degrees, as this curbs premature growth. The best time for planting is around fall for healthier yields; spring time is ideal too though the cloves will sprout into small head garlic, but which are resistant to winter’s cold.

A single clove will produce full head garlic, thus you can determine how much garlic you harvest by the number of cloves you plant.

Types of Garlic

Generally, there are two types of garlic; those that grow with softer necks that can be braided and those with hard necks and stiff centered stalks. Soft neck garlic maintains their freshness longer and just like onions are harvested when the tops withers off. On the other hand, the hard necks are more winter tolerant and have to be harvested immediately the foliage layer begins browning. An added advantage of the hard necks is the green flowery scapes that can be harvested and eaten raw, sautéed, roasted or caramelized to accentuate the flavor.

Purchasing the Seed

When buying garlic seed, it’s best to use those seeds well suited for your environment. They should adapt to the weather conditions of your surrounding which will give you less work in terms of growing and nurturing them into full plants.

Garlic produces the best aromas when used fresh at all times. This is why keeping your own small garlic garden at home is a good idea. The above tips is all you need to start a thriving garlic garden and keep the supply going all year.

For more gardening tips at home, follow us at Pushing Daisies: Gardening Blog.

How To Grow Your Own Quinoa At Home

485575052
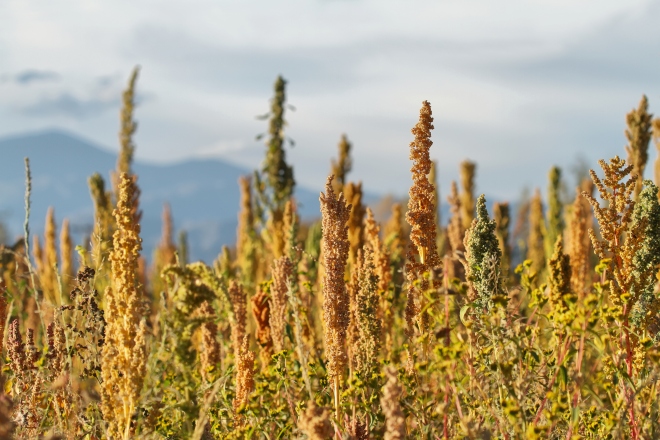
Quinoa is a grain like crop that’s grown for its edible seeds. Its leaves can also serve as vegetables, albeit on a limited scale. The plant thrives in well-drained soils and needs a considerably long maturing season. It also requires warm temperatures not exceeding 90°F (32°C.

How to Grow Quinoa

Quinoa resembles lambs’-quarters especially during the early growth stages. Seeds should thus be sown in rows to avoid confusion with the weeds. Due to the small size of the seeds, one could preempt thinning by mixing it with radish seed or sand, as is at times done with carrot seeds.

The small seeds need good surface preparation and sufficient moisture for them to germinate successfully. They should be sown in quarter inch deep rows with about one and a half to two feet between rows. One could plant them by hand or use a row seeder.

After germination, the seedlings need to be thinned to yield a 6-18-inch gap between them. The thinned seedlings can be used as additions to salads. One gram of seed sows about 50 feet of row, with an acre requiring about a pound.

Quinoa Garden Maintenance

Though quinoa is a low maintenance crop, it’s normally affected by weeds, especially in the early growth stage. There are two ways in which they can be avoided, namely mulching and cultivating. If soil moisture is sufficient, germination could be achieved without irrigation.

In such a case, one should start watering the plants only when the reach the two- or three-leaf stage. Quinoa appears to grow slowly at first but is tremendously drought resistant. When the plants reach a height of 1-2 feet, they start growing rapidly with the canopy closing in.

This helps shade out the weeds and keeps moisture evaporation low. During inspections, one may notice symptoms of insect larvae munching the seedlings. This shouldn’t be much of a concern as it won’t impact the harvest significantly.

Harvesting Quinoa

The plant is ready for harvesting when all leaves have fallen and only the dried seed heads remain. One should watch the weather when the plant reaches this stage because the dry seeds could germinate if rained on. If the heads haven’t dried completely, they should be harvested when the seeds are hard enough to resist indentation when pressed with thumbnails. They then need thorough drying before storage.

To determine if the plant is harvestable, the flower heads should be shaken briskly but gently. If the seeds fall off readily, then one could commence harvesting. Ripe grain can be gathered easily in dry weather by bending the plants over a bucket and rubbing the seed heads between one’s hands.

The seeds need to be cleaned by winnowing using a fan. Further drying is usually necessary to keep off mold during storage. One can spread it on trays during hot days or use an indoor heat source. One should keep stirring them from time to time until they’re completely dry. Quinoa seeds should be stored in in a cool, dry place using air-tight containers.

Follow us for more articles that will give you the best garden on the block.

How To Grow Spaghetti Squash In Your Garden

487479144How to Grow Spaghetti Squash

Spaghetti squashes take 90 to 100 days to harvest, require regular watering, warm weather and a full sun. For this reason, the seeds should never be out before the frost day has gone by. Of course, you can start the seedlings indoors. For that, you will need to culture the seeds a month before the frost date.

Keep this in mind that you are not to bring them out until after two weeks of the last frost date. Dig up the soils well and loose when planting the seedlings and make sure to add some manure and compost to the soil so that it becomes nutrient-rich. When planting, you must allow a space of at least three inches between each hill.

Some consider the idea of planting vertical spaghetti squashes, but it is normally not a good idea. These fruits grow large and heavy in size and the mature ones cannot be expected to hang unless you provide enough structures and trellises to support the fruit.

For the first few weeks, weed out the space around the hills. Thereafter, once the plants have started to mature, they will create their own sheds and would be able to keep the weeds at bay. Once the peak of summer has passed, we advise you to remove any new blossoms that are there since there will not be enough time for them to grow.

As for insect care, a spaghetti squash vine is robust enough to withstand most insect damages. However, keep an eye out for big cucumber beetles and squash bugs. They can hide inside blossoms or under the leaves, so make sure to check carefully. If the large leaves turn mildew, apply some fungicide sprays and water the plants only at the soil and not on the leaves.

Unlike other varieties of squashes, you cannot pick spaghetti squashes when small. You can harvest them only when they are fully mature. You can tell that they are fully mature when the outer skin of the fruit becomes hard enough to withstand a hard push from your fingernails.

For more news on gardening and for articles that will give you the best garden on the block, follow our blog “Pushing Daisies: Gardening Blog”

Growing Eggplants The Right Way

453229071

Heat-loving eggplants are easy to grow where summer is long and warm. They produce the biggest fruits during this growing season and will give you a handful of eggplants a week. Eggplant varieties differ mainly in size, shape, the color of the fruits, growth habit, and maturation period. Here are some methods on how to grow eggplant to get a bountiful harvest and a glowing garden in return:

Any fertile soil with a pH level ranging from 6.3 to 6.8 can satisfy this plant, but raised beds enriched with composted manure are the best growing sites. Gardeners in cool climates grow their plants in a large and dark-colored containers for warmth. Although the eggplant’s leathery leaves can withstand hot weather, make sure to leave a generous mulch of hay or any biodegradable materials beneath the plants to keep the soil cool. This method will not only hold the moisture, but it will also keep the weeds down.

Another important thing to consider is your gardening space. This factor is important because eggplants usually grow tall and with angular plants. Your space should keep them 24 to 36 inches apart. To fertilize plants, mix a balanced timed-release or organic compost by following the rates provided on the label. Make sure to keep your plants watered so they will not be small and bitter. Tie them to stakes to avoid the fruits from falling over. Alternatively, you can use small tomato cages for additional support.

In some areas, a common soil-borne fungus called Verticillium Wilt is the reason eggplants wilt and die. To avoid this problem, fill your eggplant containers with premium potting mix. You will know that the eggplant is ready for harvest if they have hard flesh and small seeds. A perfect fruit has a glossy skin and well-formed but immature seeds. They will taste bitter when underripe or overripe, so knowledge in harvesting is a must if you want to master how to grow eggplant.

Eggplants may be considered a finicky plant, but if you can keep them warm and free from pest damage, you can enjoy an excellent harvest.

Follow Us For More Great Articles and Features That Will Keep Your Garden The Envy of All Your Neighbors…